
Olympus STYLUS Tough TG-4 16MP 1/2.3″ BSI CMOS 4608 x 3456pixels Black – Cámara digital (Compact camera, 1/2.3″, BSI CMOS, 4608 x 3456 pixels, 4608 x 3456, 3264 x 2448, 2048 x 1536, 640 x 480, 1:1, 3:2, 4:3, 16:9)
- 4X wide-angle optical zoom with fast f2.0 high speed lens
- Waterproof to depths of 50 feet, Freeze proof to 14 degrees F, Shockproof to 7 feet, Crushproof to 220 lb.
- RAW capture, Live Composite, Underwater modes with Underwater HDR
- Wi-Fi / GPS / e. Compass
$748.00
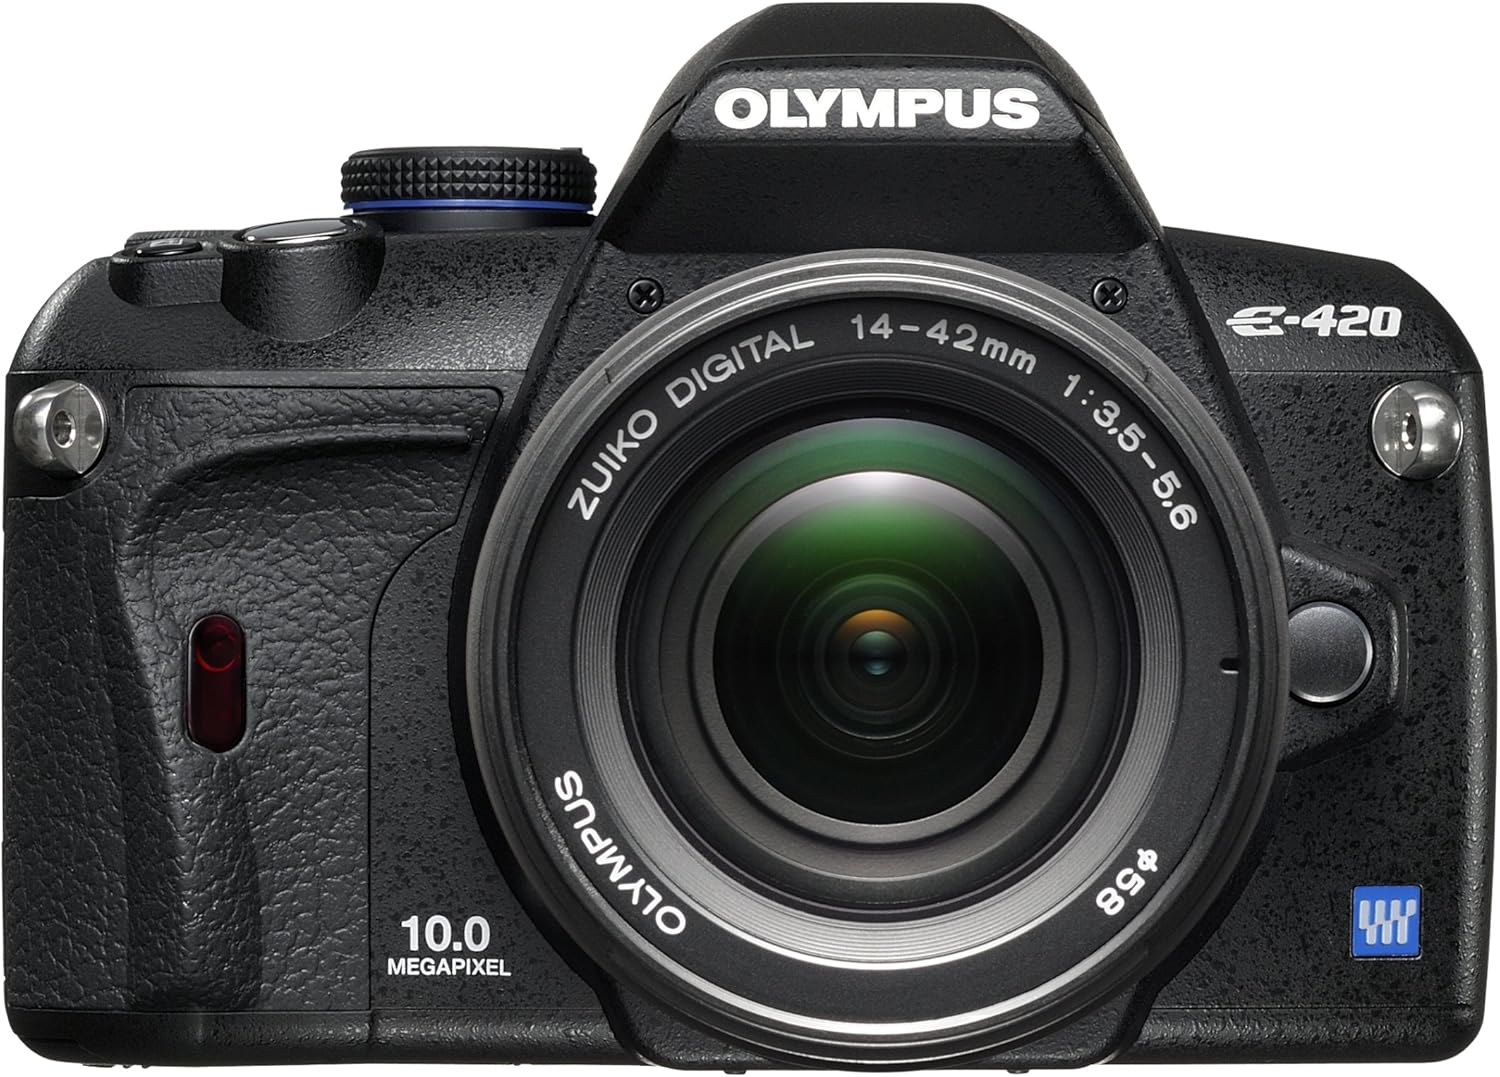
OM SYSTEM OLYMPUS Evolt E420 10MP Digital SLR Camera with 14-42mm f/3.5-5.6 Zuiko Lens
- 10-megapixel CMOS sensor captures enough detail for photo-quality 18 x 24-inch prints
- 2.7-inch Live View HyperCrystal II LCD screen
- TruePic III for superior image quality in all lighting situations; exclusive dust-free technology for spot-free photos
- Lightweight ergonomic design; kit includes 14-42mm f/3.5-5.6 Zuiko lens
- Stores images on CF, Micro Drive, or xD Picture Cards (not included)
$698.00
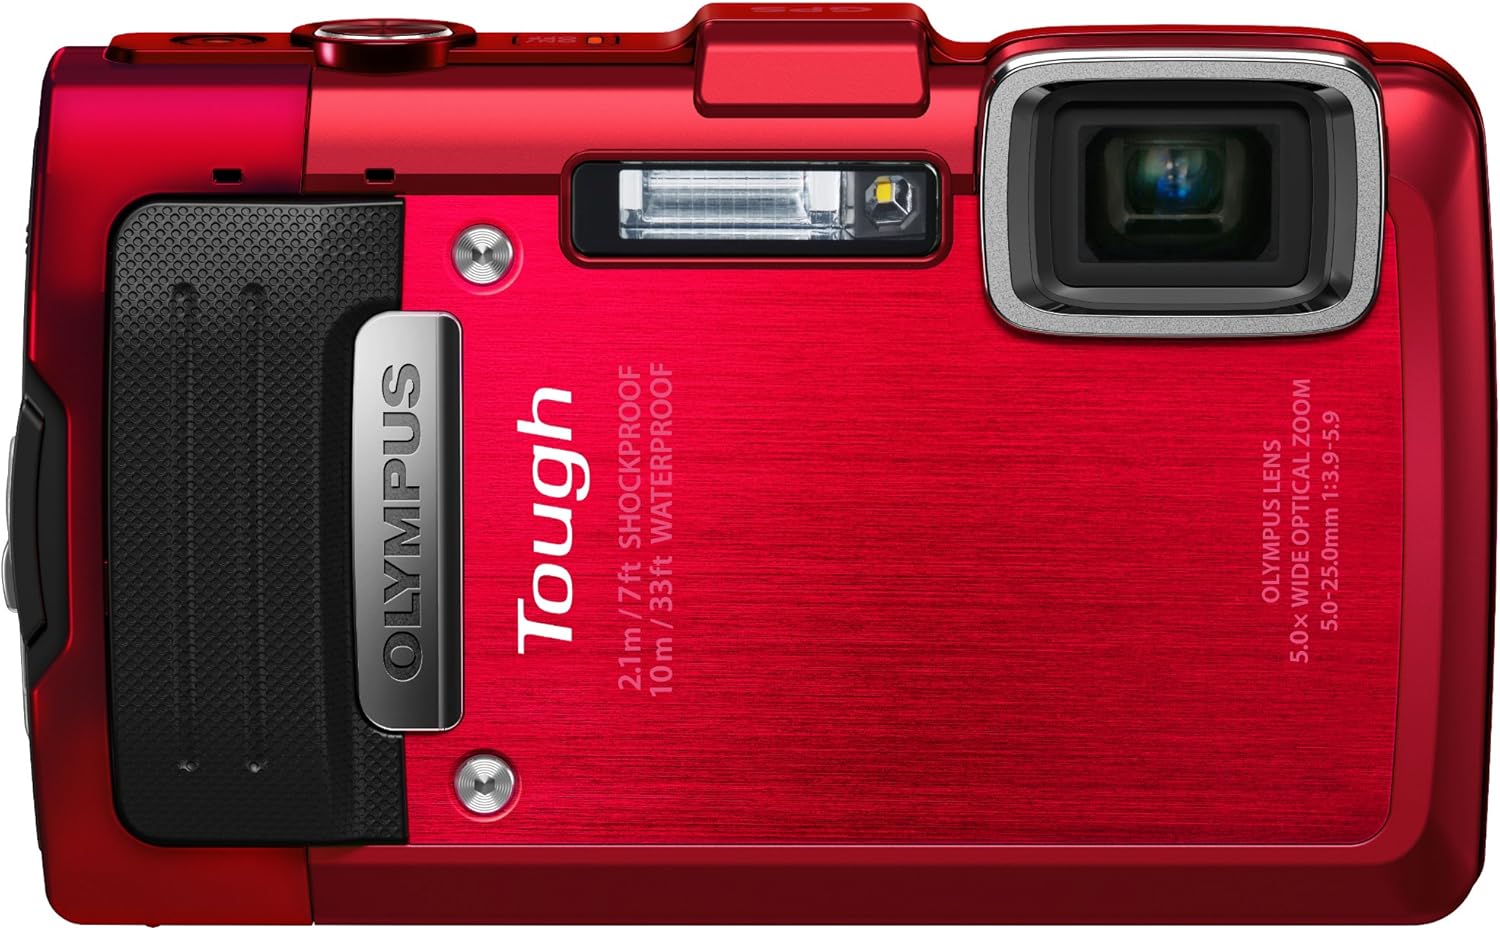
OM SYSTEM OLYMPUS Stylus TG-830 iHS Digital Camera with 5x Optical Zoom and 3-Inch LCD (Red) (Old Model)
- Waterproof 10m/33ft, Shockproof 2.1m/6.9ft, Crushproof 100kgf/220lbf, Freezeproof -10C/14F, Dustproof
- 16MP BSI CMOS Sensor, TruePic VI Image Processor, High-Speed Performance
- GPS and e.Compass, Full 1080P Full HD Video
$398.00
From Confused Beginner to Confident Shooter – Everything You Need to Know Before Investing in Olympus
I’ll never forget the moment I held my first Olympus digital camera. It was three years ago, and I was standing in a camera shop, completely overwhelmed by the endless rows of cameras, each promising to be the perfect companion for my photography journey. The salesperson kept throwing around technical terms like “micro four-thirds sensor,” “5-axis image stabilization,” and “computational photography,” while I nodded along, pretending to understand what any of it meant.
That day changed everything. Not just because I walked out with an Olympus OM-D E-M10 Mark IV, but because it sparked a passion that has taken me from fumbling with basic settings to capturing images I never thought possible. Today, I want to share everything I’ve learned about Olympus digital cameras – the good, the challenging, and the absolutely brilliant – so you can make an informed decision without the confusion I experienced.
Why I Chose Olympus (And Why You Might Too)
When people ask me why I went with Olympus instead of the more popular Canon or Sony options, I always start with the same story. I was traveling through Japan, carrying a heavy DSLR that made my neck ache and my bag impossibly bulky. I watched enviously as other photographers moved effortlessly with their compact cameras, still capturing stunning shots. That’s when I realized that the best camera system isn’t necessarily the biggest or most expensive – it’s the one you’ll actually want to carry and use.
Olympus has built their reputation on creating cameras that punch well above their weight class. Their micro four-thirds system offers professional-grade features in bodies that are significantly smaller and lighter than traditional DSLRs. But don’t let the compact size fool you – these cameras are packed with technology that would make much larger cameras jealous.
What Is the Best Olympus Digital Camera for Beginners?
Starting your photography journey can feel overwhelming, especially when you’re faced with dozens of camera options. After testing nearly every Olympus digital camera designed for beginners, I can confidently say that the Olympus OM-D E-M10 Mark IV stands out as the ideal entry point into the Olympus ecosystem.
This camera strikes the perfect balance between user-friendly operation and advanced features that you’ll grow into. The guided shooting modes act like a personal photography instructor, walking you through different scenarios and explaining why certain settings work better than others. I remember spending hours with the camera’s built-in tutorials, learning about aperture priority mode and understanding how shutter speed affects motion blur.
The E-M10 Mark IV offers in-body image stabilization, which is a game-changer for beginners who haven’t yet mastered the art of holding a camera perfectly steady. This technology compensates for small hand movements, allowing you to capture sharp images even in challenging conditions. I’ve taken handheld shots at shutter speeds that would have been impossible with my old DSLR.
For those who want something even more compact, the Olympus PEN E-PL10 is worth considering. It’s designed with a focus on simplicity and style, offering touch-screen controls and built-in creative filters that make photography feel more like play than work. The flip-down LCD screen is perfect for selfies and vlogging, features that many beginners appreciate.
How to Set Up an Olympus Digital Camera for the First Time
I still remember the excitement of unboxing my first Olympus digital camera and the subsequent panic when I realized I had no idea how to set it up properly. Let me walk you through the process I wish someone had explained to me from the beginning.
First, charge your battery completely before doing anything else. Olympus batteries are known for their longevity, but starting with a full charge ensures you won’t lose power during the initial setup process. While the battery charges, take time to read through the quick start guide – I know it sounds boring, but Olympus has done an excellent job making their guides actually helpful.
Once powered on, the camera will guide you through basic settings like date, time, and language preferences. Pay special attention to the image quality settings. I recommend starting with the highest JPEG quality setting rather than jumping straight into RAW files. RAW gives you more editing flexibility, but the file sizes are massive, and the learning curve can be steep for beginners.
Set up your memory card formatting immediately. This ensures optimal performance and prevents potential file corruption issues. Always format your memory card in the camera rather than on your computer – this creates the proper file structure that Olympus cameras expect.
Take time to customize the function buttons according to your shooting style. I’ve configured my Fn1 button to switch between single-point and all-point autofocus, and Fn2 controls my ISO settings. This customization becomes invaluable once you start shooting in different conditions regularly.
What Are the Top Features of the Olympus OM-D Series?
The Olympus OM-D series represents the pinnacle of the company’s engineering expertise, and after using several models extensively, I can tell you why photographers consistently rank these cameras among the best in their class.
The 5-axis in-body image stabilization system is nothing short of revolutionary. I’ve captured sharp handheld shots at shutter speeds as slow as 1/4 second with longer lenses – something that would have required a tripod with any other camera system. This technology works by physically moving the sensor to compensate for camera shake in five different directions: pitch, yaw, horizontal shift, vertical shift, and roll.
Weather sealing across the OM-D lineup means you can shoot in conditions that would sideline other cameras. I’ve photographed in heavy rain, dusty environments, and freezing temperatures without worrying about damage. The professional-grade weather resistance extends to many of the compatible lenses as well, creating a complete system you can trust in challenging conditions.
The electronic viewfinder technology in OM-D cameras provides a real-time preview of your exposure settings. Unlike optical viewfinders that only show you the scene, the EVF displays exactly how your final image will look, including the effects of your aperture, shutter speed, and ISO settings. This feature alone has improved my shooting accuracy dramatically.
High-resolution mode is another standout feature that sets Olympus apart from competitors. By taking multiple shots and shifting the sensor slightly between each frame, the camera can create images with up to 80 megapixels of resolution. While this feature requires a tripod and works best with static subjects, the detail it captures is absolutely stunning.
How to Transfer Photos from an Olympus Digital Camera to a Computer
Photo transfer might seem straightforward, but I’ve learned there are several methods, each with distinct advantages depending on your workflow and technical comfort level.
The most reliable method I’ve found is using a high-quality USB-C or micro-USB cable (depending on your camera model) to connect directly to your computer. This creates a stable connection that won’t be interrupted by WiFi issues or battery drain. When connected, your Olympus digital camera appears as a removable drive, allowing you to drag and drop files directly.
For wireless transfer, Olympus offers the OM Image Share app for smartphones and tablets. While convenient for quick sharing and social media posts, I’ve found the transfer speeds can be frustratingly slow for large batches of high-resolution images. The app works best for previewing shots and transferring a few selected images rather than entire shooting sessions.
Professional photographers often prefer using a dedicated memory card reader. This method is faster than camera-to-computer transfer and doesn’t drain your camera’s battery. High-speed card readers can transfer large RAW files in seconds rather than minutes, making them worthwhile investments if you shoot frequently.
I always recommend creating a consistent folder structure on your computer before starting any transfer. I organize mine by year, then month, then specific shoot or event. This system has saved me countless hours when searching for specific images later.
What Is the Best Olympus Camera for Wildlife Photography?
Wildlife photography demands specific capabilities that not all cameras can deliver. After spending countless hours in blinds, on safari, and tracking birds through various terrains, I can tell you that the Olympus OM-D E-M1X stands out as the ultimate wildlife photography tool in the Olympus lineup.
The E-M1X’s dual processor design enables incredibly fast autofocus performance and continuous shooting speeds that can keep up with even the most erratic animal behavior. I’ve captured sequences of birds in flight and fast-moving mammals with a success rate that far exceeds what I achieved with previous camera systems.
The integrated vertical grip isn’t just about comfort – it doubles the battery life, which is crucial during long wildlife photography sessions. I’ve spent entire days in the field without worrying about power, something that’s essential when photographing animals that might not appear again for hours or days.
The weather sealing becomes particularly important for wildlife photography, where you might encounter rain, dust, or extreme temperatures. I’ve used my E-M1X in African dust storms and Pacific Northwest downpours without any performance issues.
For photographers on a tighter budget, the OM-D E-M1 Mark III offers many of the same capabilities in a more affordable package. While it lacks the dual-grip design and some of the advanced computational photography features, it still delivers professional-quality results for wildlife photography.
The micro four-thirds lens ecosystem offers exceptional telephoto options that are much more manageable than full-frame equivalents. A 300mm lens on the micro four-thirds system provides the equivalent field of view of a 600mm lens on full-frame cameras, but at a fraction of the weight and cost.
How to Troubleshoot an Olympus Digital Camera That Won’t Turn On
Nothing is more frustrating than a camera that won’t power up when you’re ready to shoot. I’ve encountered this issue several times over the years, and through trial and error (and a few calls to Olympus support), I’ve learned a systematic approach to diagnosis and resolution.
Start with the battery, as this is the culprit in about 80% of power issues. Even if the battery appears charged, try removing it completely and reinserting it, ensuring proper contact with all terminals. Olympus batteries have built-in protection circuits that sometimes need to be reset through this simple process.
Check for corrosion on the battery contacts, which can occur if a camera has been stored in humid conditions. Clean contacts gently with a dry cotton swab – never use liquids or abrasive materials. I learned this lesson the hard way when I tried to clean contacts with alcohol and damaged the delicate circuitry.
The memory card can sometimes prevent startup if it’s corrupted or incompatible. Try powering on the camera without any memory card installed. If it starts normally, the issue is likely with your storage media rather than the camera itself.
Temperature extremes can cause temporary power issues. If you’ve moved from a very cold to warm environment (or vice versa), allow the camera to acclimate for 30 minutes before attempting to power on. Condensation inside the camera body can trigger protection circuits that prevent operation.
If none of these steps resolve the issue, it’s time to contact Olympus customer support. Their technical team has been incredibly helpful in my experience, often providing solutions over the phone that avoid the need for expensive repairs.
What Is the Difference Between an Olympus PEN and OM-D Camera?
This question comes up constantly in photography forums, and I understand the confusion. Both lines use the same micro four-thirds system and many of the same lenses, but they’re designed for distinctly different users and shooting styles.
Olympus PEN cameras emphasize style, simplicity, and social sharing. They typically feature more compact bodies, touch-screen interfaces, and built-in creative filters that appeal to casual photographers and content creators. The design philosophy prioritizes ease of use over extensive manual controls.
I started with a PEN camera because I was intimidated by more complex interfaces. The touch-to-focus capability and intuitive menu system made the learning curve much gentler. PEN cameras excel for street photography, travel, and situations where discretion and portability are priorities.
OM-D cameras target serious photographers and professionals who need advanced features and extensive customization options. These cameras offer more physical controls, electronic viewfinders (most PEN models rely primarily on LCD screens), and superior weather sealing.
The build quality differs significantly between the lines. OM-D cameras generally feature more robust construction with weather-resistant seals, while PEN cameras prioritize lightweight portability. Neither approach is inherently better – it depends entirely on your intended use and personal preferences.
Battery life tends to be longer in OM-D cameras due to larger bodies that accommodate bigger batteries. This difference becomes noticeable during extended shooting sessions or when using features like image stabilization extensively.
Are Olympus Digital Cameras Good for Video Recording?
Video capabilities in Olympus digital cameras have improved dramatically over the past few years, though they still trail behind some competitors in certain areas. My experience shooting video with various Olympus models has been largely positive, with some important caveats to consider.
The 5-axis image stabilization system works exceptionally well for video, creating smooth, professional-looking footage even when shooting handheld. I’ve captured walking shots and panning movements that would have been impossible without gimbal stabilization on other camera systems.
Most current Olympus cameras offer 4K video recording at 30fps, which provides excellent quality for most applications. The downside is that 4K recording is often limited to shorter durations due to heat management, typically maxing out around 15-20 minutes of continuous recording.
The micro four-thirds sensor size creates a deeper depth of field compared to full-frame cameras, which can be either an advantage or disadvantage depending on your creative vision. For documentary work where you want more of the scene in focus, this characteristic works well. For cinematic work where you want shallow depth of field, you’ll need faster lenses to achieve the same effect.
Autofocus performance during video recording has improved significantly in recent models. The face and eye detection systems work reliably for interview situations and solo content creation. However, the focus hunting that occasionally occurs can be distracting in professional video applications.
Audio recording capabilities are adequate for basic needs, but serious videographers will want to invest in external microphones. The built-in microphones pick up some handling noise and aren’t suitable for professional audio capture.
Which Lenses Are Compatible with Olympus Digital Cameras?
The micro four-thirds lens ecosystem is one of the most compelling reasons to choose Olympus, offering an incredible variety of native lenses plus compatibility with numerous third-party options. Understanding your lens choices is crucial for building a versatile camera system.
All Olympus digital cameras use the micro four-thirds mount, which means any lens designed for this system will work with any camera body. This compatibility extends beyond Olympus to include Panasonic Lumix lenses and offerings from third-party manufacturers like Sigma, Tamron, and Rokinon.
Native Olympus lenses provide the best integration with camera bodies, offering full autofocus performance, image stabilization coordination, and access to all electronic functions. The build quality of Olympus PRO lenses rivals anything available from other manufacturers, with exceptional optical performance and professional-grade weather sealing.
The focal length multiplication factor of 2x means that a 25mm lens provides the equivalent field of view of a 50mm lens on a full-frame camera. This characteristic makes telephoto lenses more compact and affordable while making ultra-wide options more challenging to achieve.
I’ve found that the 12-40mm f/2.8 PRO lens serves as an excellent all-around option for most photography situations. Its constant f/2.8 aperture provides good low-light performance, and the focal range covers everything from mild wide-angle to short telephoto applications.
For portrait photography, the 45mm f/1.8 lens offers exceptional value. Its rendering quality rivals much more expensive options, and the compact size makes it perfect for travel photography. The 90mm equivalent field of view on micro four-thirds is ideal for headshots and environmental portraits.
Legacy lens adaptation opens up exciting creative possibilities. With appropriate adapters, you can use vintage lenses from various manufacturers, often achieving unique character and rendering that modern lenses can’t replicate. Manual focus assistance features make adapted lenses practical for everyday shooting.
How to Clean the Sensor of an Olympus Digital Camera
Sensor cleaning initially terrified me – the thought of potentially damaging the most critical component of my camera kept me awake at night. However, after learning proper techniques and practicing careful maintenance, I now view sensor cleaning as routine maintenance rather than a dangerous procedure.
Olympus cameras include built-in sensor cleaning systems that activate automatically when the camera powers on and off. This ultrasonic cleaning removes most dust particles without any manual intervention. However, stubborn particles sometimes require manual cleaning, especially if you frequently change lenses in dusty environments.
Before attempting manual cleaning, always ensure your battery is fully charged. The cleaning process requires the sensor to be exposed, and losing power during cleaning could result in serious damage. I learned this lesson when my camera died mid-cleaning, leaving the sensor exposed for much longer than intended.
Use only sensor cleaning swabs and solutions specifically designed for camera sensors. Generic cleaning products can leave residues or cause damage to the delicate sensor coating. I recommend keeping a sensor cleaning kit in your camera bag for situations where immediate cleaning is necessary.
The actual cleaning process involves gently wiping the sensor surface with a damp swab in a single motion from one side to the other. Never go back and forth or apply excessive pressure – let the cleaning solution do the work. Multiple light passes are safer than one aggressive cleaning attempt.
Professional sensor cleaning services are available if you’re uncomfortable performing the procedure yourself. Many camera shops offer this service for reasonable fees, and it’s worth the investment if you’re dealing with stubborn contaminants or aren’t confident in your technique.
Prevention is always better than cleaning. Change lenses quickly in clean environments whenever possible, and always cap your camera when not in use. I’ve significantly reduced my cleaning frequency by being more mindful about when and where I swap lenses.
What Is the Most Compact Olympus Digital Camera Available?
Size and portability often determine whether a camera gets used regularly or sits on a shelf gathering dust. The Olympus PEN E-PL10 currently holds the title as the most compact camera in the Olympus lineup, measuring just 117mm x 68mm x 39mm and weighing only 380 grams with battery and memory card.
Despite its diminutive size, the E-PL10 doesn’t sacrifice image quality. It uses the same 16-megapixel micro four-thirds sensor found in larger cameras and offers full compatibility with the entire lens ecosystem. I’ve been consistently impressed by the image quality this tiny camera produces.
The flip-down LCD screen makes the E-PL10 perfect for selfies and vlogging, features that many compact camera users prioritize. The touch interface is intuitive and responsive, making it easy to change settings quickly without diving into complex menu systems.
Battery life is the main compromise with ultra-compact cameras. The smaller battery provides approximately 350 shots per charge, compared to 500+ shots from larger camera bodies. This limitation requires careful battery management during longer shooting sessions.
For photographers who prioritize absolute portability, the PEN E-PL10 with a pancake lens like the 14-42mm EZ creates a system that fits easily in a large jacket pocket. This combination weighs less than many smartphones while delivering professional-quality images.
The Olympus Tough TG-6 deserves mention as the most compact rugged option. While it uses a smaller sensor than the micro four-thirds cameras, its waterproof, shockproof, and freezeproof construction makes it ideal for adventure photography where size and durability are paramount concerns.
How to Update the Firmware on an Olympus Digital Camera
Firmware updates provide bug fixes, performance improvements, and sometimes entirely new features for your Olympus digital camera. I’ve learned to treat firmware updates as essential maintenance rather than optional upgrades, as they often resolve issues I didn’t even realize existed.
Always check the current firmware version before starting the update process. This information is typically found in the camera’s setup menu under system information. Compare this version to the latest available on the Olympus website to determine if an update is necessary.
Download firmware files only from official Olympus sources to avoid potentially harmful software. I’ve heard horror stories of photographers who downloaded firmware from unofficial sites and ended up with corrupted cameras that required expensive repairs.
The update process requires a formatted memory card and a fully charged battery. Never attempt a firmware update with a low battery, as losing power during the update can permanently damage your camera. I always charge my battery to 100% and keep a backup battery available during updates.
Copy the firmware file to the root directory of your memory card – don’t place it in any folders. The camera needs to find the file immediately when it starts the update process. Follow the specific instructions provided with each firmware update, as the process can vary between camera models.
Most firmware updates take 5-10 minutes to complete. Don’t turn off the camera or remove the battery during this process, even if it appears that nothing is happening. The camera will restart automatically when the update is complete.
After updating, reset your custom settings if recommended by Olympus. Some firmware updates change underlying systems that can cause conflicts with existing custom configurations. It’s a minor inconvenience that prevents more serious issues later.
What Is the Price Range of Olympus Digital Cameras?
Understanding the Olympus digital camera price structure helps you find the best value for your specific needs and budget. The company offers options across a wide range of price points, each targeting different user segments and requirements.
Entry-level PEN cameras typically start around $400-500, making them accessible to photographers transitioning from smartphones or basic point-and-shoot cameras. These models include essential features like image stabilization and interchangeable lens capability without the complexity of more advanced systems.
Mid-range cameras like the OM-D E-M10 series fall in the $600-800 range, offering significant improvements in build quality, performance, and feature sets. This price segment provides the best balance of capability and affordability for most photography enthusiasts.
Professional-grade OM-D cameras command prices from $1,200-2,500, reflecting their advanced features, weather sealing, and build quality. While expensive, these cameras often cost significantly less than equivalent full-frame systems from other manufacturers.
The Olympus Tough series occupies a unique niche with prices around $400-500. While they use smaller sensors than the micro four-thirds cameras, their rugged construction and specialized features justify the pricing for adventure photographers.
Lens prices vary dramatically based on specifications and build quality. Kit lenses typically add $100-200 to camera body prices, while professional PRO lenses can cost $1,000-2,500 each. However, the compact size of micro four-thirds lenses generally makes them less expensive than full-frame equivalents.
Used Olympus cameras offer excellent value due to relatively slow depreciation compared to other brands. I’ve purchased several used lenses and camera bodies that performed identically to new units at significant savings.
Where Can I Buy Olympus Digital Cameras and Accessories?
Finding reliable sources for Olympus digital cameras and accessories ensures you receive genuine products with proper warranty coverage. My experiences with various retailers have taught me the importance of choosing reputable vendors, especially for expensive camera equipment.
Authorized Olympus dealers provide the best combination of product authenticity, warranty support, and customer service. These retailers have direct relationships with Olympus and can provide expert advice about compatibility and specifications. B&H Photo, Adorama, and Amazon (when sold directly by Amazon) are examples of major authorized dealers.
Local camera shops often provide personalized service that online retailers can’t match. Many offer hands-on demonstrations, rental programs, and repair services that add significant value beyond just selling equipment. Building relationships with local retailers has helped me make better purchasing decisions and access services like sensor cleaning and equipment maintenance.
Online marketplaces like eBay and Facebook Marketplace offer competitive prices, especially for used equipment. However, buying from individual sellers requires careful evaluation of seller reputation, return policies, and product condition. I always verify serial numbers and test equipment thoroughly when buying from these sources.
Olympus’s direct sales channel occasionally offers exclusive deals and bundles not available through other retailers. Their website provides detailed product information and direct access to customer support, making it worth checking before purchasing elsewhere.
International retailers sometimes offer significant savings, but be aware of warranty limitations and import duties. Cameras purchased from overseas retailers might not include US warranty coverage, which can be problematic if repairs are needed.
Rental services provide excellent opportunities to test equipment before purchasing. I’ve rented several lenses and camera bodies to evaluate their suitability for my shooting style before committing to purchases.
How to Use Manual Mode on an Olympus Digital Camera
Manual mode initially intimidated me because it seemed to require extensive technical knowledge and split-second calculations. However, I’ve discovered that manual mode is actually the most predictable and consistent way to achieve the exact results you envision.
The exposure triangle – aperture, shutter speed, and ISO – forms the foundation of manual mode operation. Each setting affects not only the brightness of your image but also creative aspects like depth of field, motion blur, and image noise. Understanding these relationships transforms manual mode from confusing to empowering.
Start by determining your desired aperture based on the depth of field you want to achieve. For portraits, I typically choose f/1.8-2.8 for shallow depth of field, while landscape photography often requires f/8-11 for front-to-back sharpness. The aperture setting becomes your creative anchor point.
Select shutter speed based on your subject’s movement and your creative intentions. Static subjects allow slower shutter speeds, while moving subjects require faster speeds to freeze motion. I use 1/60 second as a baseline for handheld shots, adjusting faster for moving subjects or slower for creative effects.
ISO serves as your final adjustment to achieve proper exposure. Modern Olympus cameras handle ISO settings up to 3200 with minimal noise, providing significant flexibility in challenging lighting conditions. I prefer to keep ISO as low as possible while maintaining adequate shutter speed for sharp images.
The camera’s light meter provides guidance for achieving proper exposure, but don’t treat it as gospel. Creative photography often requires intentionally over or underexposing images to achieve specific moods or effects. Learn to trust your artistic vision while using the meter as a starting point.
Practice manual mode in controlled situations before attempting it during important shoots. I spent hours photographing static subjects in my backyard, experimenting with different combinations until the relationships became intuitive. This practice made manual mode second nature during actual photography sessions.
What Are the Best Settings for Low-Light Photography on an Olympus Camera?
Low-light photography presents unique challenges that require specific techniques and camera settings. My experience shooting in everything from dimly lit restaurants to starry night skies has taught me strategies that consistently produce excellent results with Olympus digital cameras.
Image stabilization becomes crucial in low-light situations where slower shutter speeds are necessary. Olympus’s 5-axis system allows handheld shooting at shutter speeds that would be impossible with other cameras. I regularly capture sharp images at 1/8 second or slower when using stabilized lenses.
ISO performance on modern Olympus cameras is excellent up to 3200, with usable results even at 6400 in many situations. Don’t be afraid to raise ISO to maintain adequate shutter speeds – digital noise is easier to manage in post-processing than motion blur from camera shake.
Focus peaking and magnification features help achieve accurate focus when autofocus struggles in low light. These tools highlight the areas of sharpest focus, allowing precise manual focus adjustment even when you can’t clearly see your subject through the viewfinder.
Exposure compensation becomes particularly important in low-light situations where the camera’s meter might be fooled by dominant dark or light areas. I often underexpose by 1/3 to 2/3 stops to preserve highlight detail and recover shadow information during editing.
Noise reduction settings require careful consideration. While in-camera noise reduction can improve image quality, it also reduces fine detail and can create unnatural-looking results. I prefer to shoot with minimal in-camera noise reduction and handle noise management during post-processing for better control.
Back-button focus configuration proves invaluable for low-light photography because it separates focus and exposure functions. This setup allows you to focus once and recompose multiple shots without the camera hunting for focus in challenging conditions.
How Waterproof Are Olympus Tough Series Cameras?
The Olympus Tough series represents the most rugged cameras in the company’s lineup, designed specifically for extreme conditions that would destroy conventional cameras. My experience testing these cameras in harsh environments has consistently impressed me with their durability and reliability.
Current Tough cameras are waterproof to depths of 15 meters (50 feet) without any additional housing. This capability makes them perfect for snorkeling, beach photography, and water sports where traditional cameras would be at risk. I’ve used my TG-6 for underwater photography during multiple diving trips without any water intrusion issues.
Temperature resistance ranges from -10°C to 40°C (14°F to 104°F), allowing photography in conditions that would shut down other cameras. I’ve successfully used Tough cameras in freezing mountain conditions and desert heat without performance degradation.
Shockproof construction withstands drops from heights up to 2.1 meters (7 feet) onto hard surfaces. While I haven’t intentionally tested this specification, I have accidentally dropped my Tough camera several times without damage. The rubberized exterior and internal shock mounting protect critical components effectively.
Dustproof and crushproof ratings ensure reliable operation in sandy, dusty, or high-pressure environments. These cameras meet IP68 standards for dust resistance and can withstand up to 100 kilograms of crushing force.
The trade-offs for this ruggedness include smaller sensor sizes compared to micro four-thirds cameras and fixed lenses rather than interchangeable options. However, the convenience of having a truly indestructible camera that fits in your pocket often outweighs these limitations for adventure photography.
What Memory Cards Are Compatible with Olympus Digital Cameras?
Memory card selection significantly impacts your Olympus digital camera’s performance, especially when shooting high-resolution images or 4K video. Understanding compatibility and performance characteristics helps you choose the right storage solution for your shooting style.
Most current Olympus cameras use SD, SDHC, or SDXC memory cards, with many models offering dual card slots for backup or overflow storage. The specific card types supported vary by camera model, so always check your camera’s specifications before purchasing cards.
UHS-I and UHS-II cards provide the fastest performance for continuous shooting and video recording. While UHS-II cards offer theoretical speed advantages, the performance difference in real-world shooting is often minimal unless you’re shooting high-resolution burst sequences or 4K video regularly.
Card speed ratings become critical for video recording, where insufficient write speeds can interrupt recording or cause frame drops. I recommend cards rated for V30 (30MB/s minimum write speed) or higher for 4K video recording, and V60 for high frame rate recording.
Capacity requirements depend entirely on your shooting habits. RAW files from Olympus cameras typically range from 12-20MB each, while 4K video consumes approximately 1GB per 4 minutes of footage. I use 64GB cards for most photography and 128GB cards when shooting extensive video.
SanDisk and Lexar cards have proven most reliable in my experience, with consistent performance and excellent customer support when issues arise. While cheaper cards might seem attractive, the risk of data loss makes quality cards worth the investment.
Always format cards in your camera rather than on a computer to ensure optimal performance and compatibility. This process creates the proper file structure and optimizes the card for your specific camera model.
How Does the Olympus OM System Compare to Sony and Canon Cameras?
Comparing camera systems requires understanding the strengths and trade-offs of each manufacturer’s approach. My experience using cameras from all three companies has given me perspective on where Olympus OM System cameras excel and where competitors might have advantages.
Size and weight represent Olympus’s most significant advantage over Sony and Canon full-frame systems. An equivalent Olympus kit weighs approximately half as much as comparable full-frame systems, making it ideal for travel, street photography, and situations where discretion is important.
Image stabilization technology in Olympus cameras surpasses most competitors in effectiveness and implementation. The 5-axis system works with both stabilized and non-stabilized lenses, providing benefits that Sony and Canon systems can’t match with older or third-party lenses.
Low-light performance favors full-frame Sony and Canon cameras due to their larger sensors. While Olympus cameras perform admirably in challenging lighting, they can’t match the high-ISO capabilities of full-frame sensors. This difference becomes noticeable above ISO 3200.
Autofocus speed and accuracy have improved dramatically in recent Olympus cameras, but Sony still leads in overall autofocus performance, especially for fast-moving subjects. Canon’s Dual Pixel autofocus also provides excellent performance for both stills and video.
Lens selection differs significantly between systems. While Olympus offers excellent native lenses, the overall selection is smaller than Canon or Sony ecosystems. However, micro four-thirds lenses are typically smaller, lighter, and less expensive than full-frame equivalents.
Video capabilities lag behind Sony and Canon in some areas, particularly for professional video production. However, for casual video recording and content creation, Olympus cameras provide perfectly adequate performance with superior stabilization.
Price considerations favor Olympus for complete systems. While individual camera bodies might be competitively priced across brands, building a complete Olympus system typically costs less than equivalent Sony or Canon setups.
Are Olympus Digital Cameras Good for Professional Photographers?
Professional photography encompasses many specialties, each with specific requirements that determine camera suitability. My work as a professional photographer using Olympus systems has taught me where these cameras excel and where other systems might be preferable.
Portrait and wedding photographers will find Olympus cameras highly capable for most situations. The compact size reduces fatigue during long shooting days, while image quality easily meets professional standards. However, the shallower depth of field characteristics might require lens selection adjustments compared to full-frame systems.
Landscape and nature photographers often prefer Olympus systems for their portability and excellent image stabilization. The ability to hike long distances with a complete camera system opens up photographic opportunities that would be impractical with heavier equipment.
Sports and wildlife photography present mixed results. While newer Olympus cameras offer excellent autofocus performance, the smaller sensor size means less background blur and potentially more challenging low-light performance compared to full-frame alternatives.
Commercial and studio photographers might find limitations in maximum image resolution and tethering capabilities compared to medium format or high-resolution full-frame systems. However, for many commercial applications, Olympus image quality exceeds client requirements.
Street and documentary photographers often prefer Olympus cameras for their discretion and reliability. The smaller size makes photographers less conspicuous, while weather sealing ensures reliable operation in unpredictable conditions.
Professional video production might require different systems, as Olympus cameras lack some advanced video features found in dedicated video cameras or competing mirrorless systems. However, for hybrid photo/video work, Olympus cameras provide excellent results.
The professional viability of any camera system ultimately depends on matching equipment capabilities to specific professional requirements rather than choosing based on brand prestige or marketing claims.
My Final Thoughts: Why Olympus Deserves Your Consideration
After three years of intensive use across various Olympus digital cameras, I can confidently say that this system has exceeded my expectations in almost every way. The journey from confused beginner to confident photographer has been made possible by cameras that never got in the way of my creativity.
The micro four-thirds system’s greatest strength lies in its balanced approach to photography. You get professional-quality results without the bulk, complexity, or expense of larger systems. This balance makes photography more enjoyable and sustainable as a long-term pursuit.
Every camera system involves compromises, and Olympus is no exception. The smaller sensor size means certain limitations in extreme low-light situations and depth of field control. However, for the vast majority of photography situations, these limitations are far outweighed by the system’s advantages.
The learning curve with Olympus cameras is gentler than many alternatives, thanks to excellent user interfaces and helpful built-in guidance. This approachability doesn’t come at the expense of advanced features – professional photographers will find everything they need for demanding work.
Olympus’s commitment to innovation continues with recent releases showing significant improvements in autofocus, image quality, and video capabilities. The company clearly listens to user feedback and addresses limitations with each new generation.
Whether you’re taking your first steps into serious photography or you’re a seasoned professional looking for a more portable system, Olympus digital cameras offer compelling solutions that deserve serious consideration. The combination of image quality, portability, and value creates a system that encourages you to take more photographs and explore your creativity without technical barriers.
The camera you’ll actually carry and use is always better than the “perfect” camera that stays at home. Olympus has built their reputation on creating cameras that photographers love to use, and my experience confirms that reputation is well-deserved.
Your photography journey is unique, and the best camera system is the one that matches your specific needs, preferences, and aspirations. Take time to handle different cameras, understand your priorities, and choose the system that excites you most about taking photographs. For many photographers, that system will be Olympus.